Installation
This guide walks you through installing Flexible Team Share and completing the initial setup on your Salesforce org.

Prerequisites
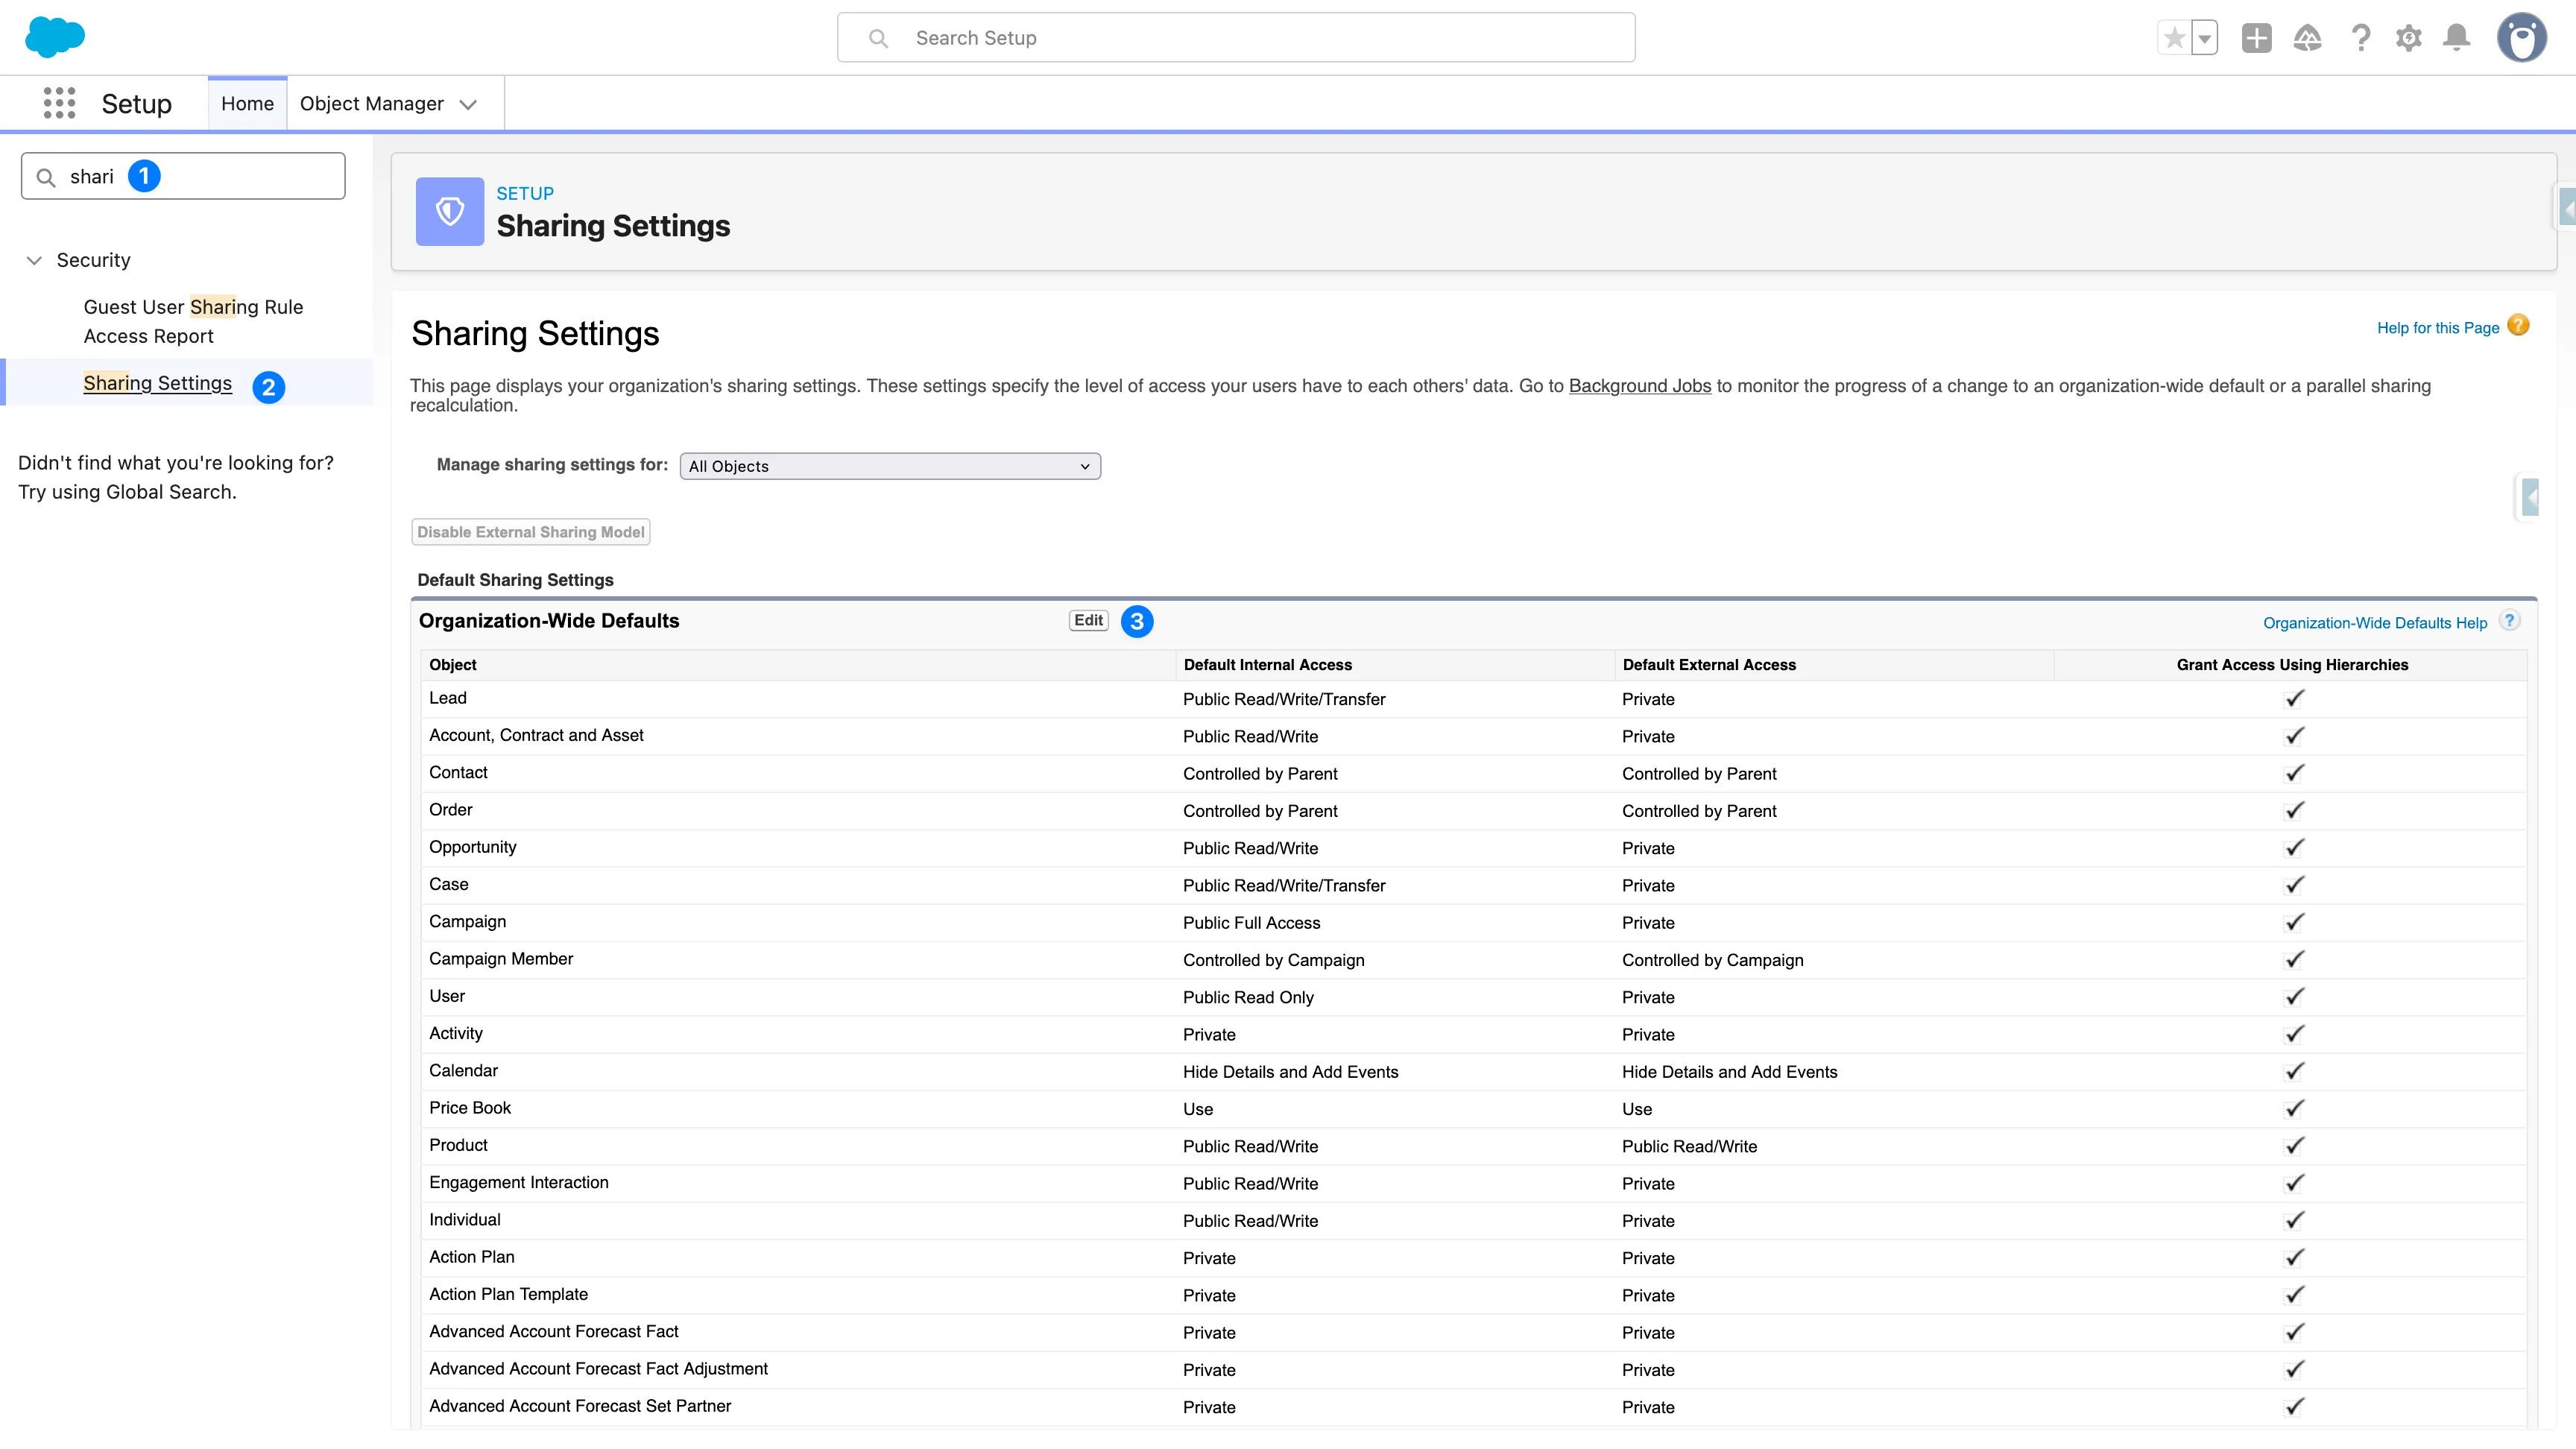
Section titled “Prerequisites”Organization-Wide Defaults
Section titled “Organization-Wide Defaults”Before configuring Flexible Team Share, ensure that the OWD sharing settings are properly configured for the objects you want to enable team functionality on.
Required sharing settings — for Flexible Team Share to work correctly, the object’s OWD must be set to one of:
- Private — Users can only see their own records (recommended)
- Public Read Only — Users can see all records but cannot edit
How to Check/Update Sharing Settings
Section titled “How to Check/Update Sharing Settings”- Go to Setup > Sharing Settings
- Find the object you want to configure
- Verify that the Default Access is set to Private or Public Read Only
- If needed, click Edit to modify the settings
Installation from AppExchange
Section titled “Installation from AppExchange”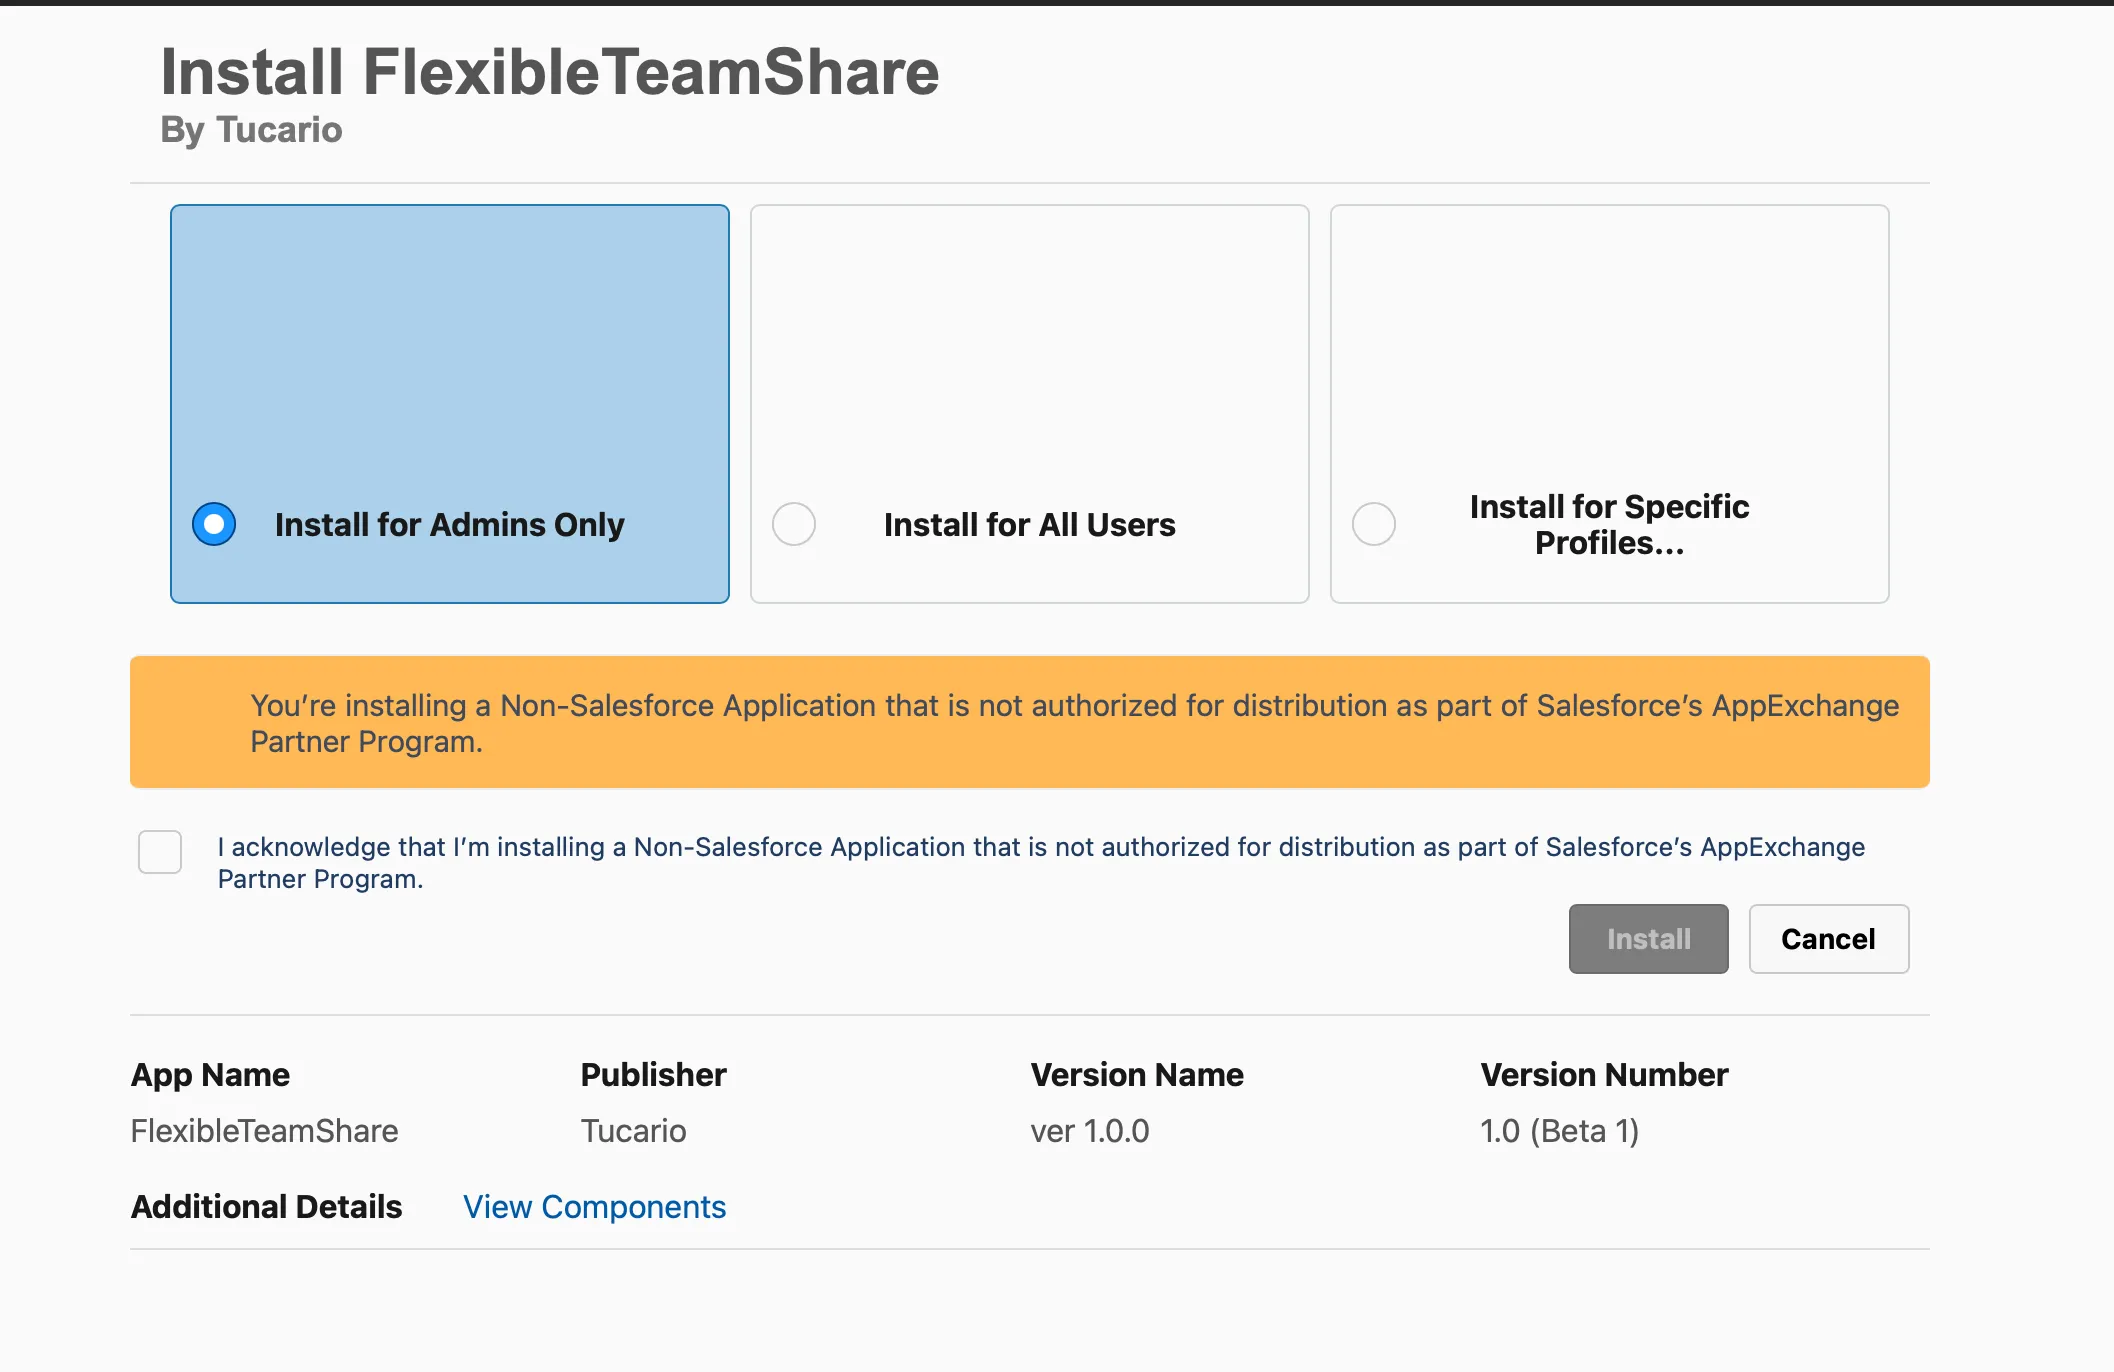
- Select “Install for Admins Only” — We strongly recommend this option. Installing for “All Users” would grant everyone immediate access to the Admin App and the Configuration Wizard. By limiting installation to Admins, you maintain full control and can later grant access to specific users via Permission Sets.
- Acknowledge the Warning — Check the box to confirm you are installing a non-Salesforce application.
- Confirm Installation — Click the Install button to proceed.
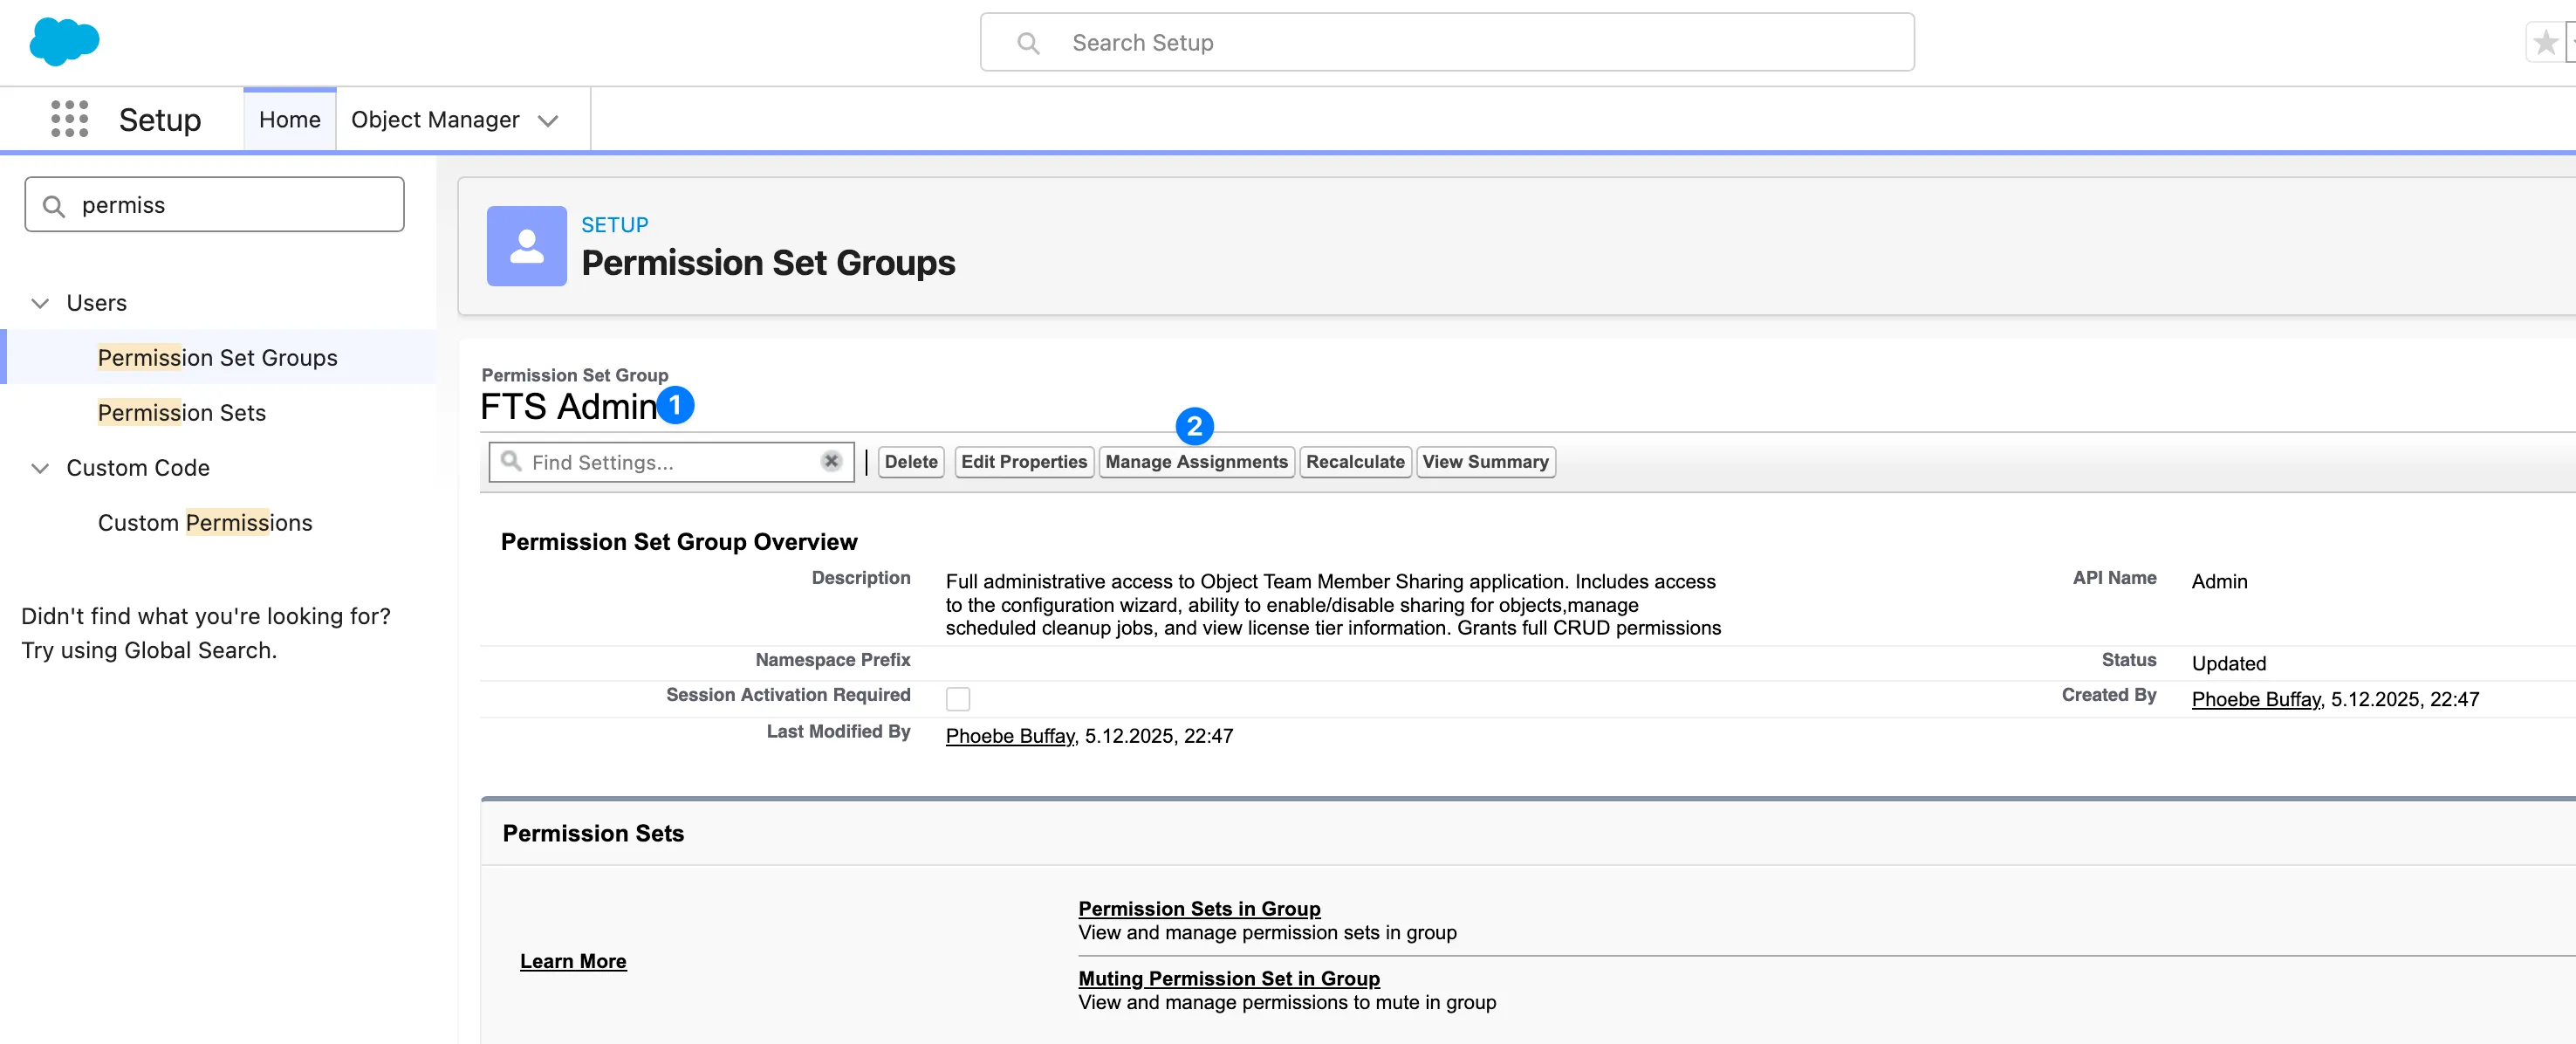
Step 1: Assign Permissions
Section titled “Step 1: Assign Permissions”Flexible Team Share includes two Permission Set Groups with different access levels:
| Permission Set Group | Description |
|---|---|
| Flexible Team Share - Admin | Full access to team member data + access to the Admin configuration app |
| Flexible Team Share - User | Access to team member data only (can view and manage team members on records) |
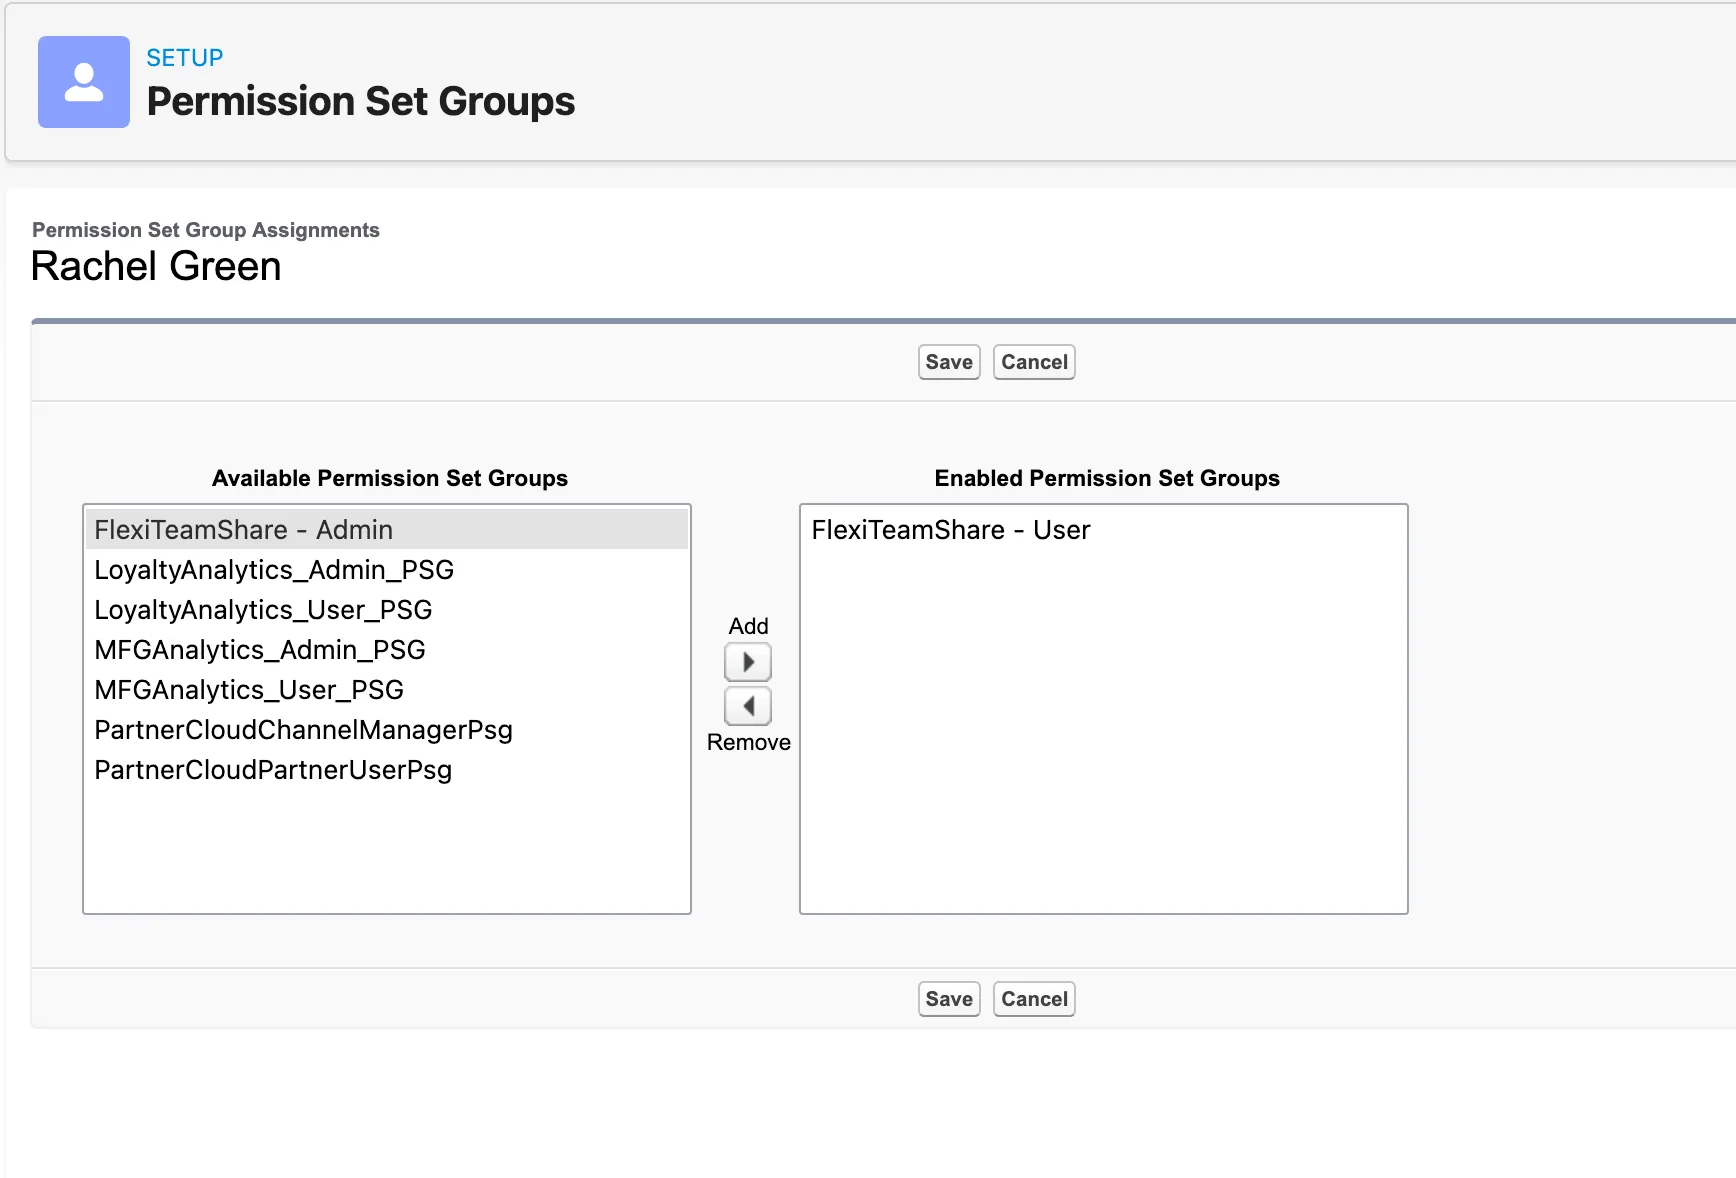
Assigning Permission Set Groups
Section titled “Assigning Permission Set Groups”-
Go to Setup > Permission Set Groups
-
Click on Flexible Team Share - Admin or Flexible Team Share - User

-
Click Manage Assignments > Add Assignments
-
Select the users and click Next > Assign
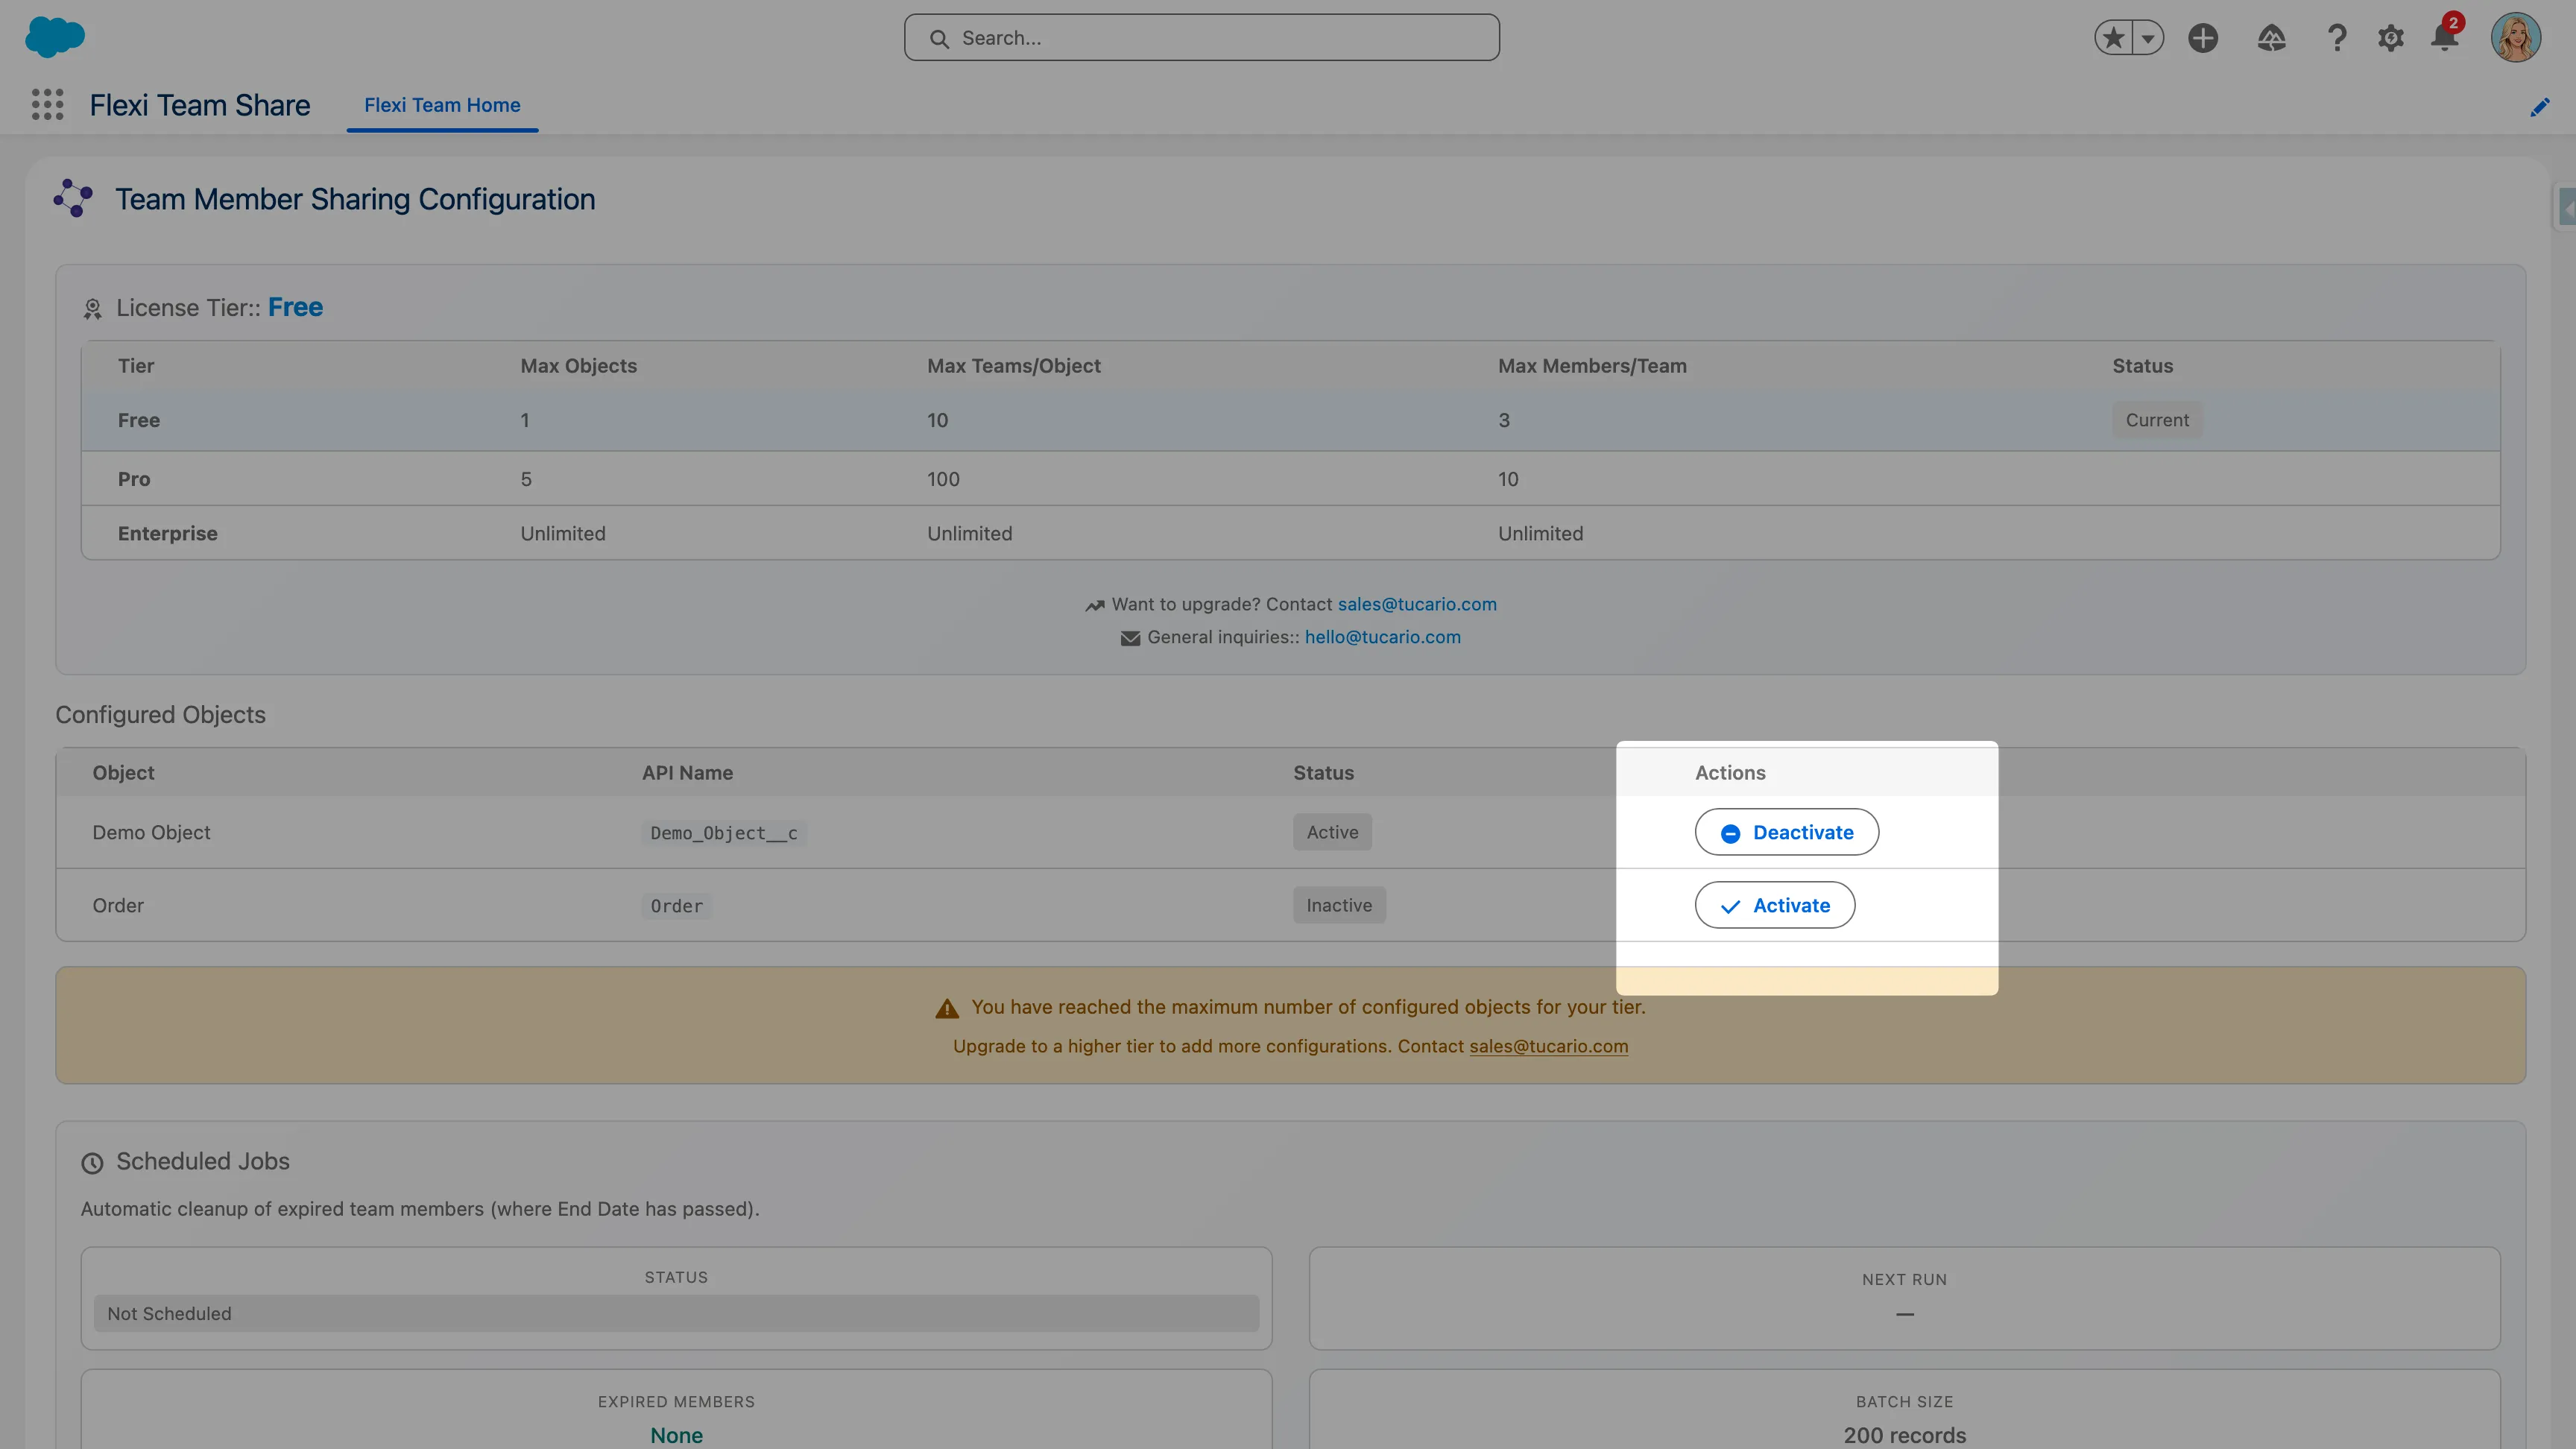
Step 2: Configure Objects
Section titled “Step 2: Configure Objects”Use the Configuration Wizard to enable team functionality for specific objects.
Open the Configuration Wizard
Section titled “Open the Configuration Wizard”- Open the App Launcher (9-dot menu)
- Search for and select Flexible Team Share
- Navigate to the Configuration tab

Add Object Configuration
Section titled “Add Object Configuration”- In the Configuration Wizard, click Add New Configuration
- Select the object you want to enable (e.g.,
Custom_Object__cor a standard object) - Provide a label for the configuration
- Click Deploy
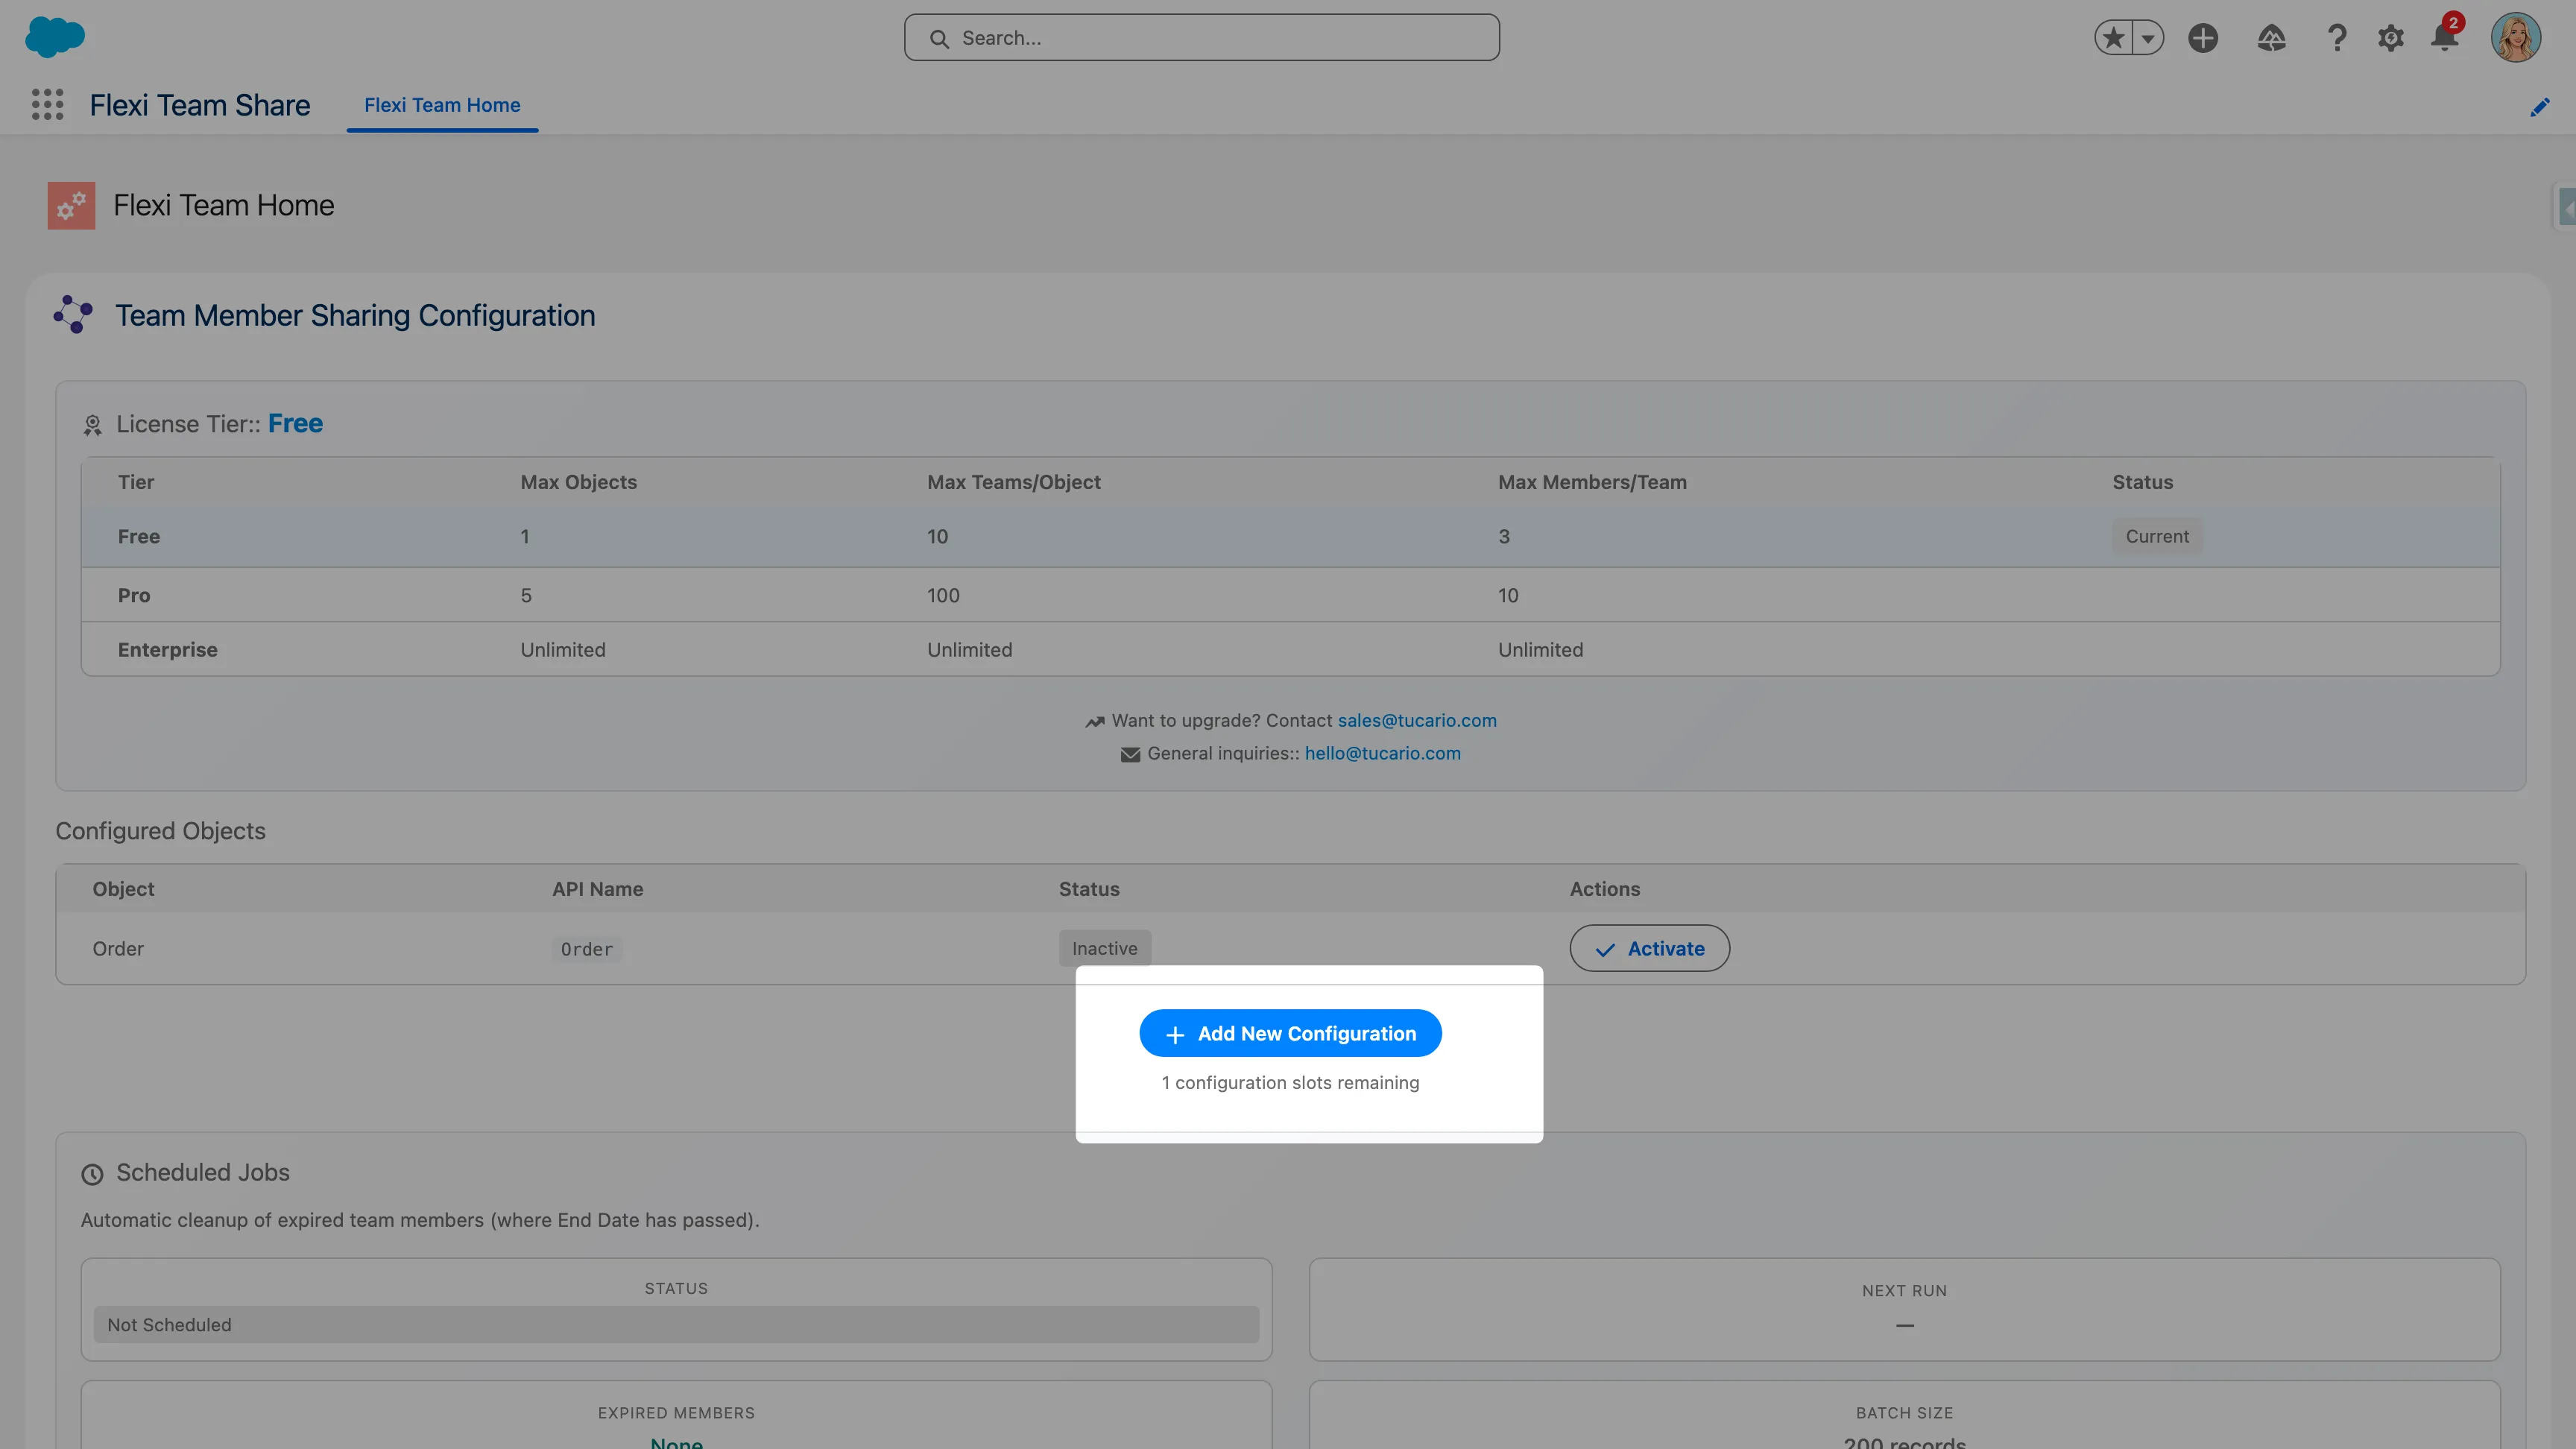
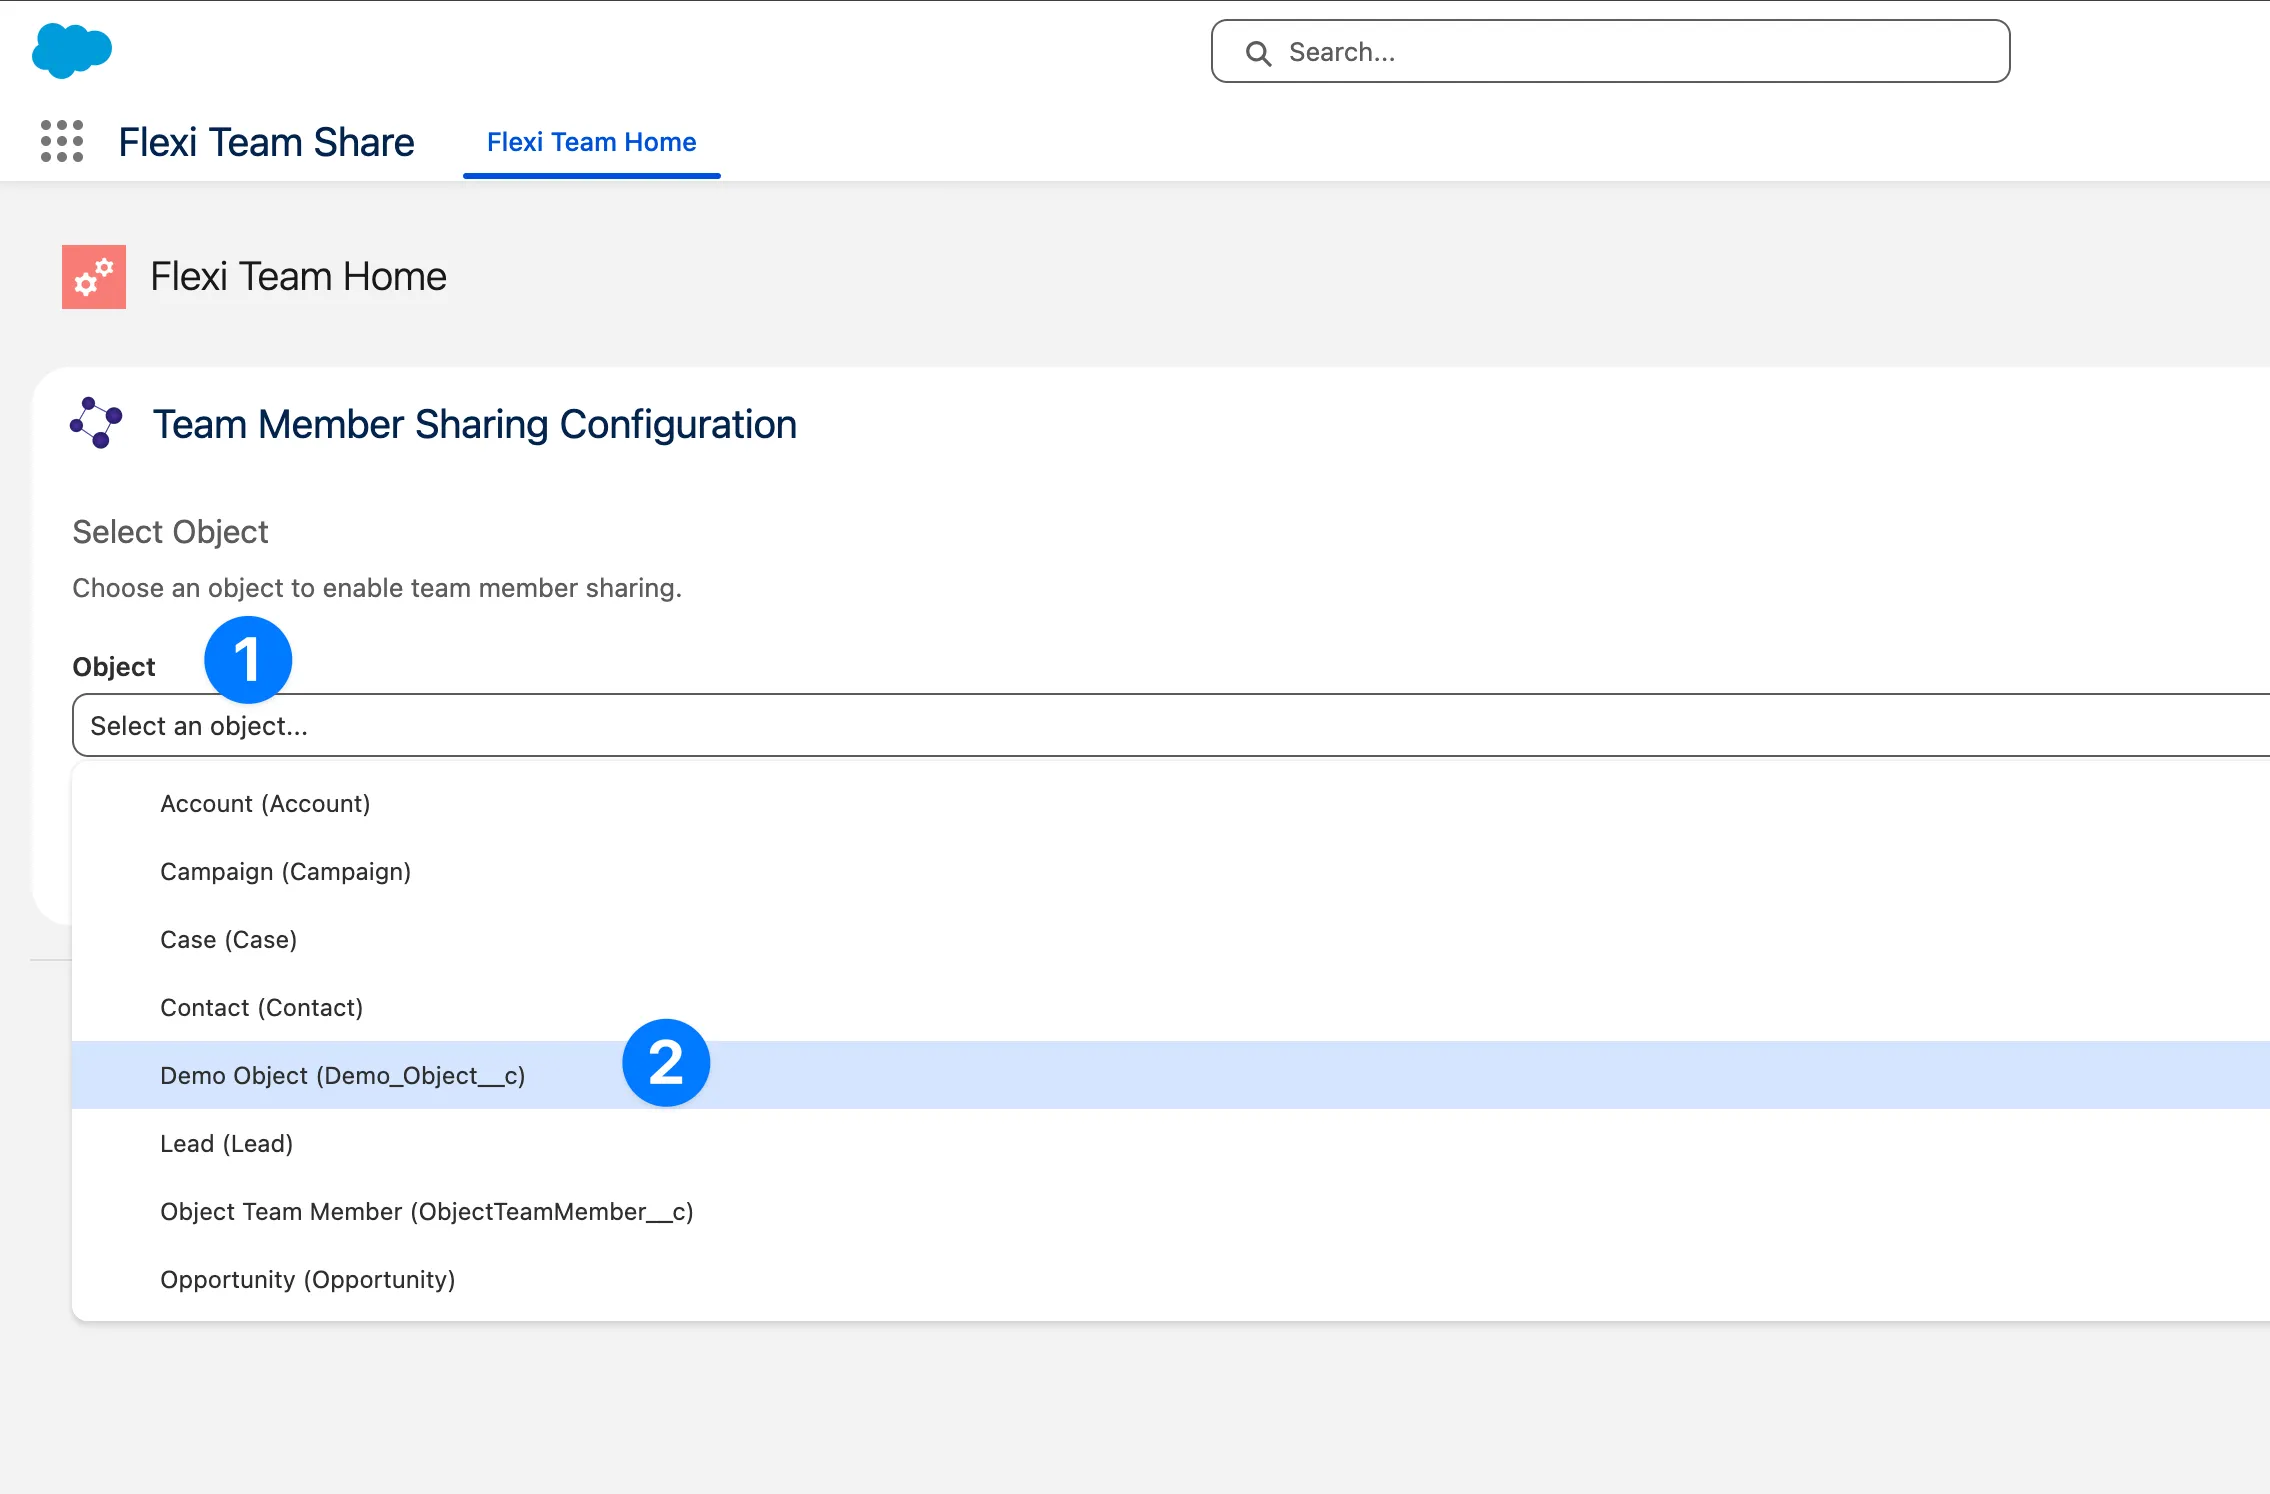
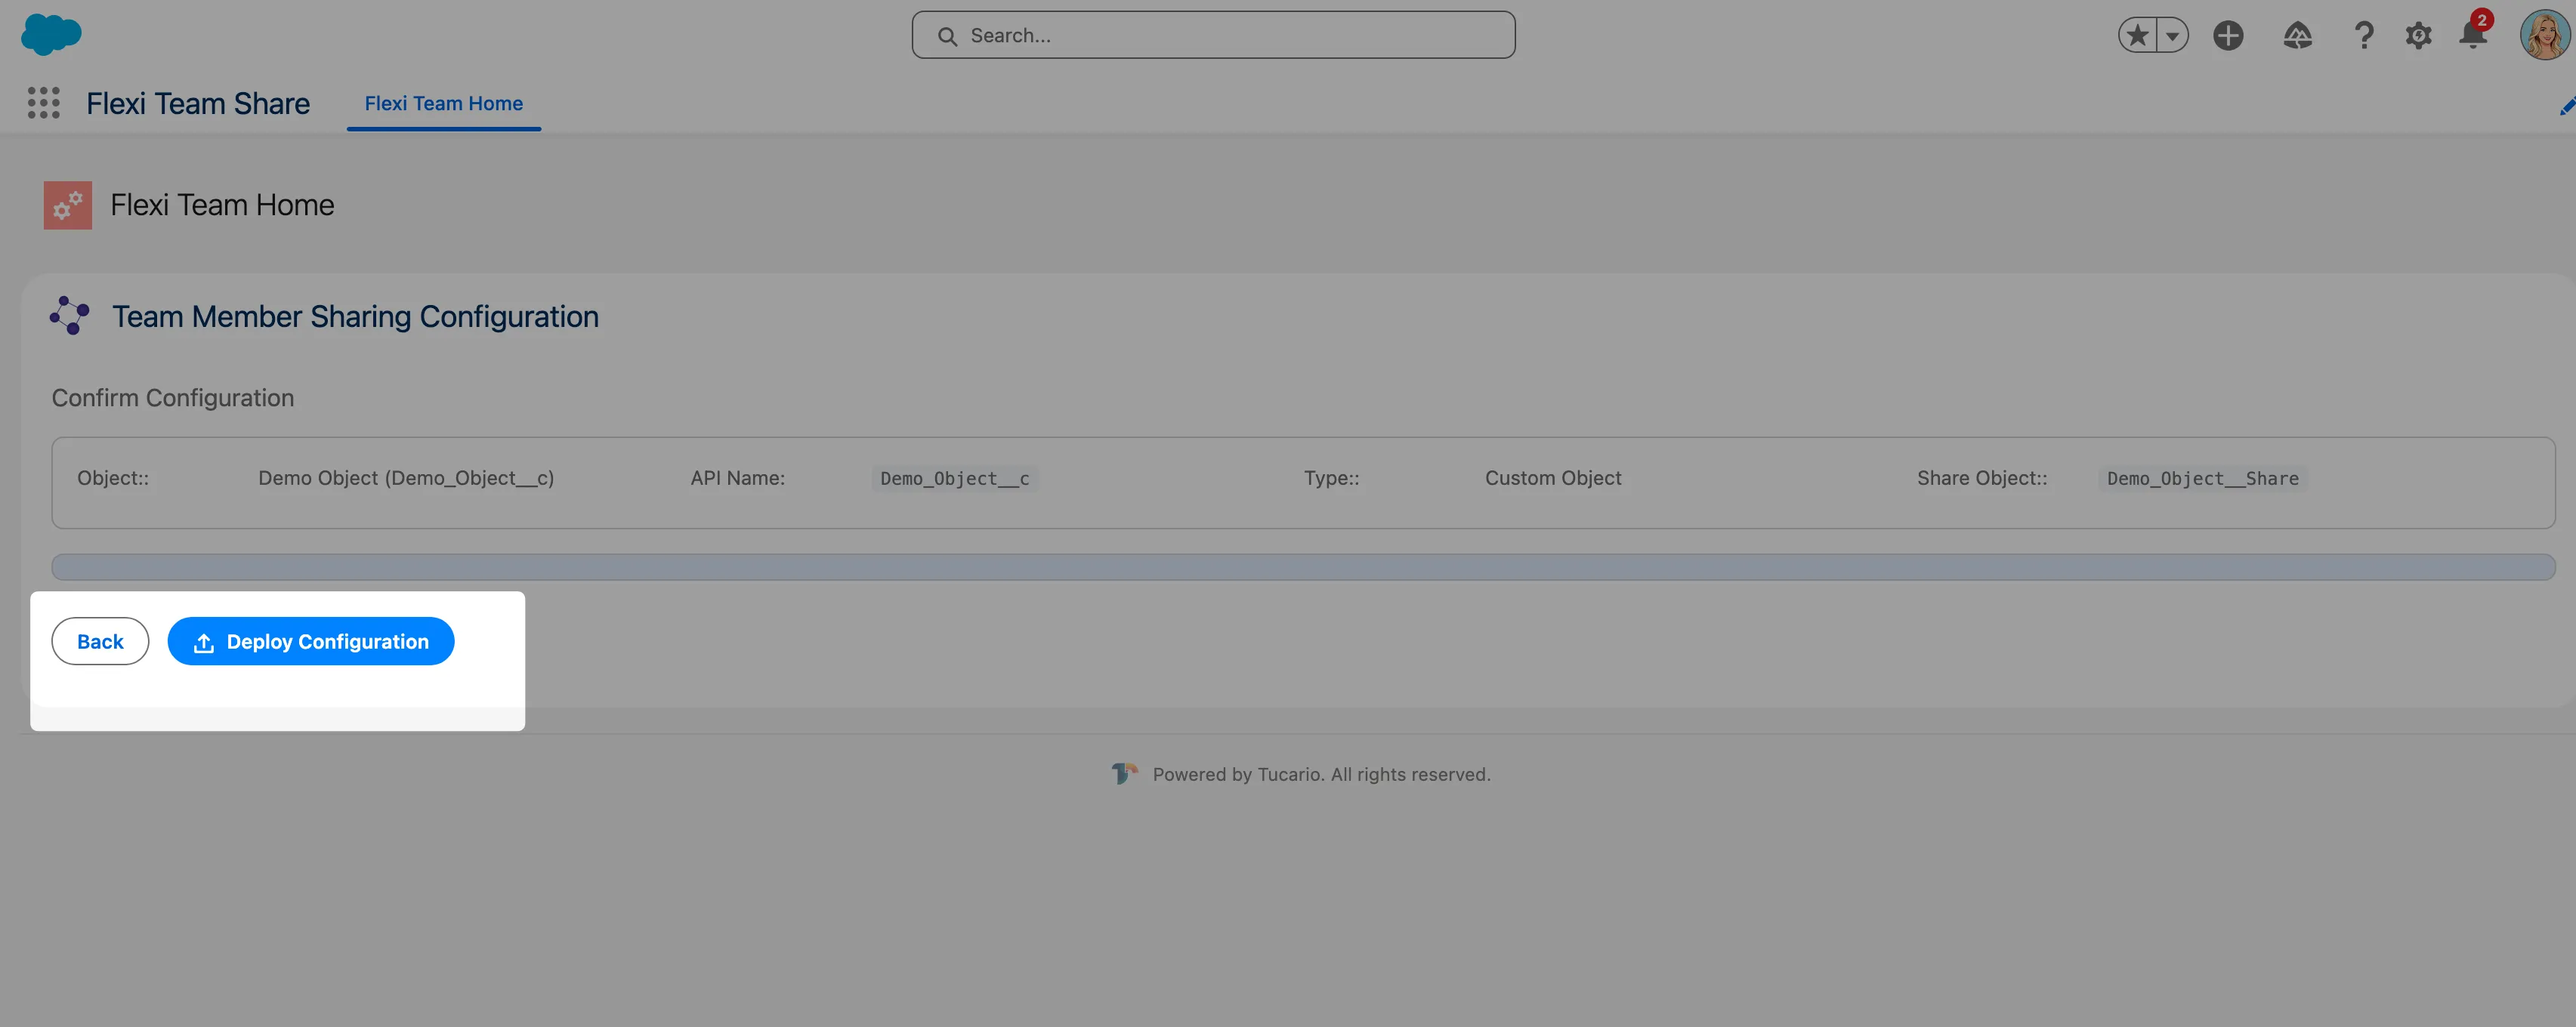
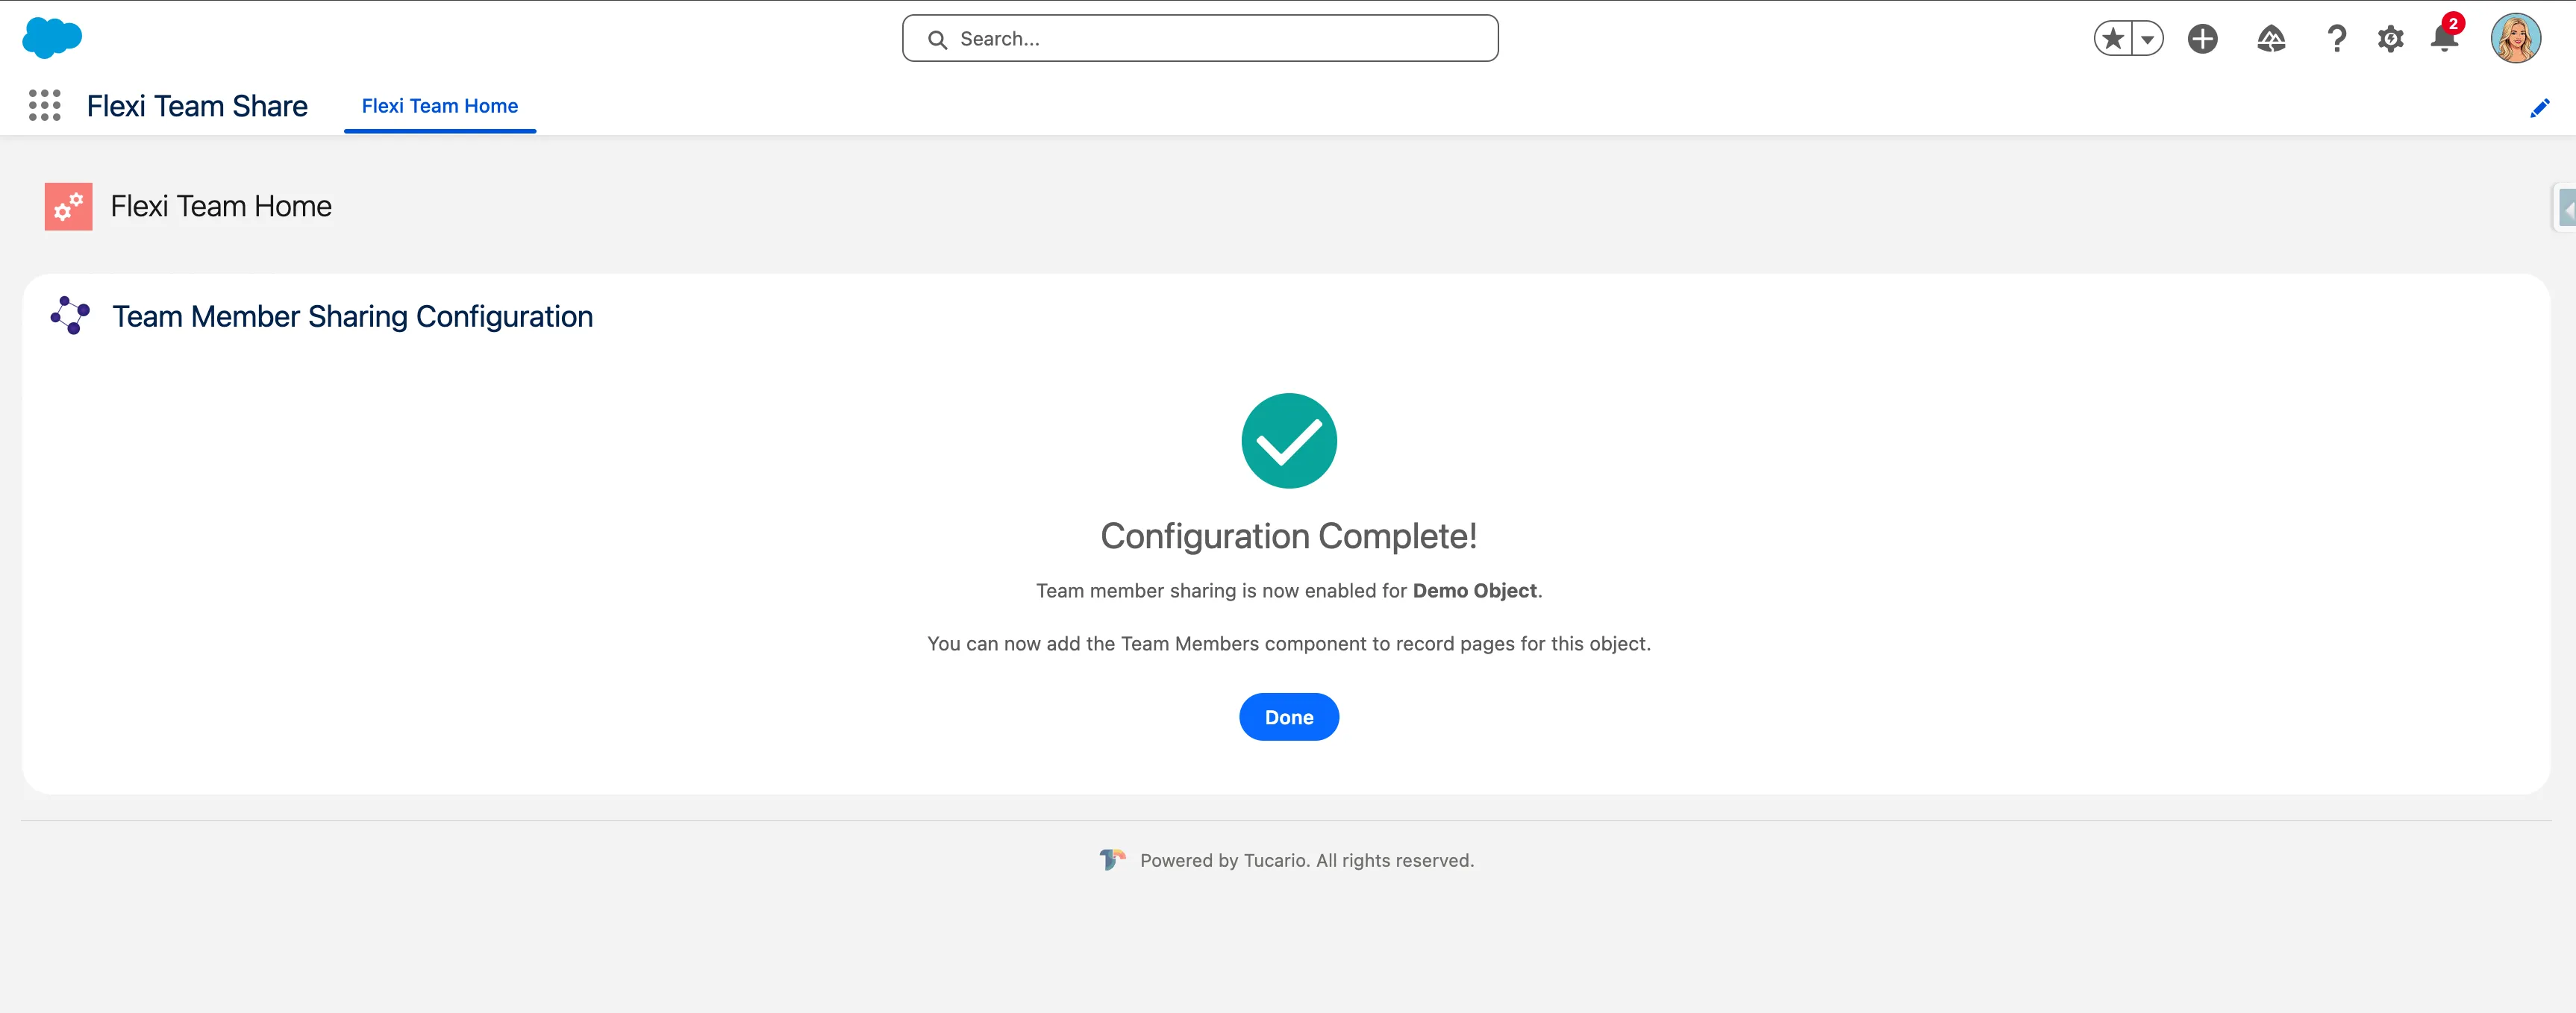
The wizard will create the necessary Custom Metadata record to enable team functionality for the selected object.
Activate/Deactivate Configurations
Section titled “Activate/Deactivate Configurations”Use the toggle switch next to each configuration to activate or deactivate team functionality. Deactivating a configuration will hide the team member component on that object’s records.
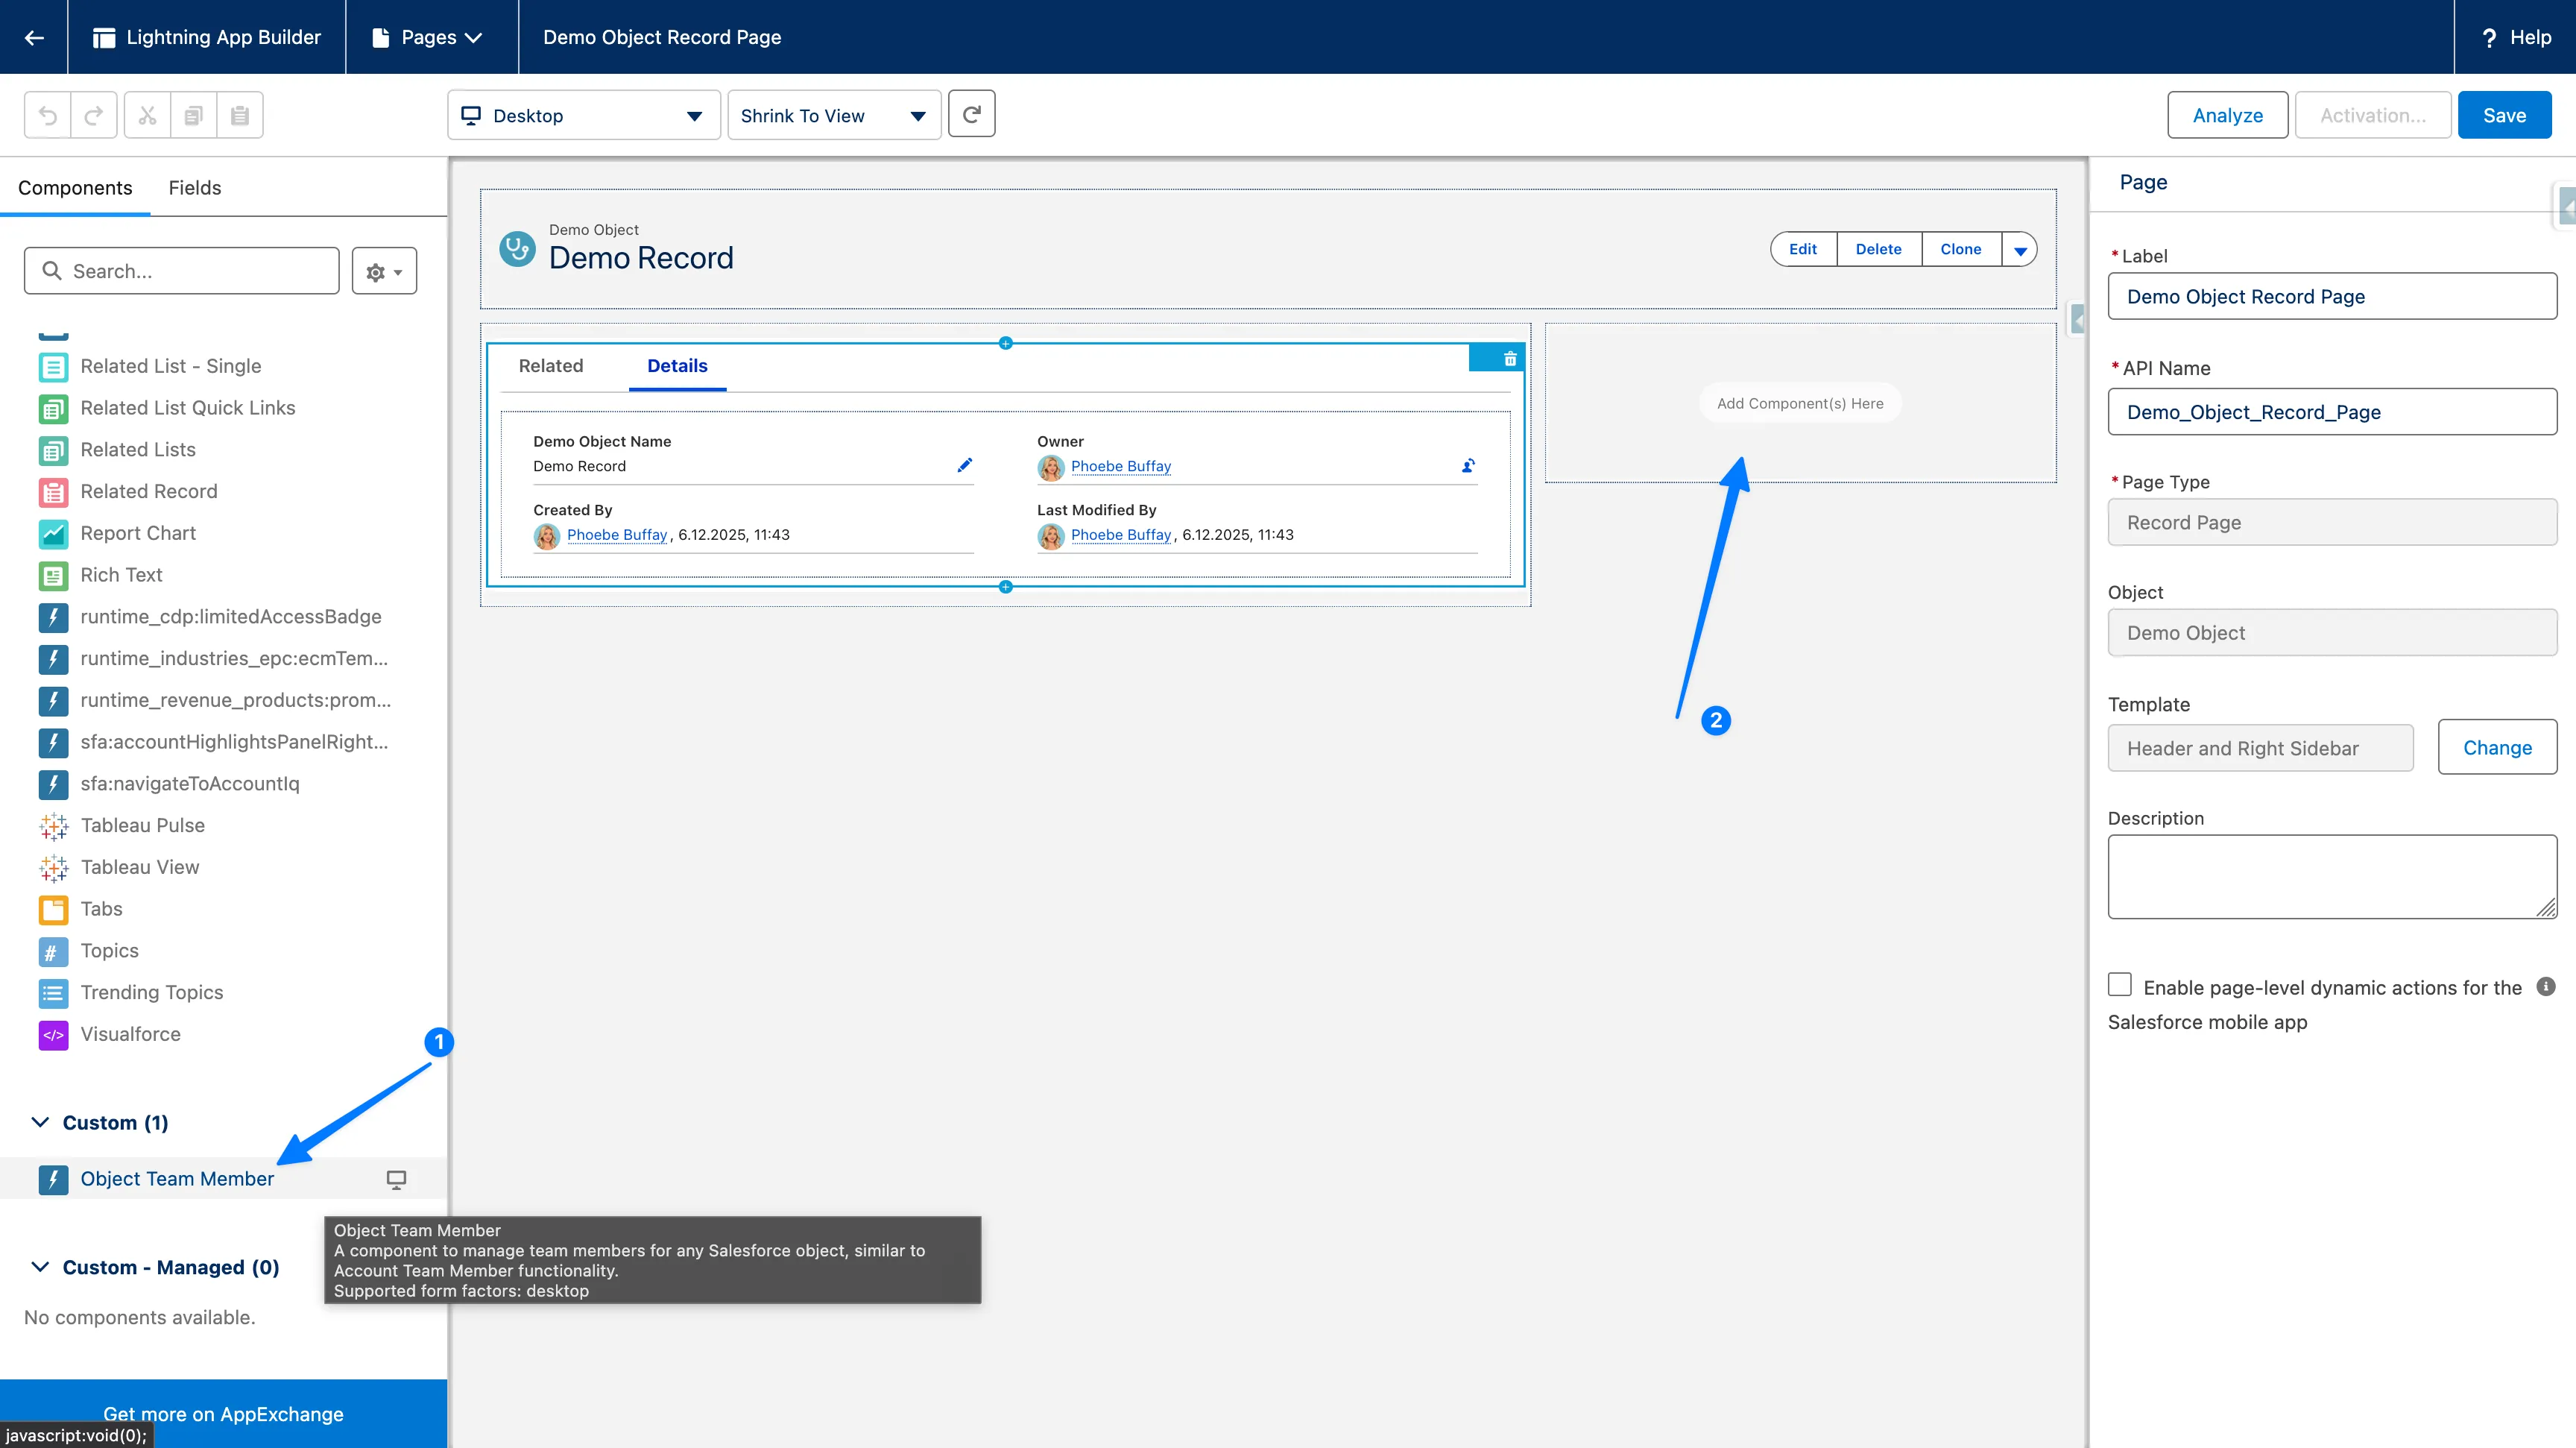
Step 3: Add Component to Record Pages
Section titled “Step 3: Add Component to Record Pages”After configuring an object, add the Team Member component to the record page layout.
Using Lightning App Builder
Section titled “Using Lightning App Builder”-
Navigate to a record of the configured object
-
Click the Gear icon > Edit Page

-
In the Lightning App Builder, find objectTeamMember in the Components panel (under Custom)
-
Drag the component to the desired location on the page
-
Click Save
-
If prompted, Activate the page for the appropriate users/profiles
Component Placement Recommendations
Section titled “Component Placement Recommendations”| Location | Best For |
|---|---|
| Right Sidebar | Quick access without taking up main content space |
| Related Lists Section | Keeps team members grouped with other related data |
| New Tab | Best for complex team management scenarios |
Verification Checklist
Section titled “Verification Checklist”After completing the installation, verify the following:
- OWD sharing settings are configured correctly for target objects
- Admin users have the Admin Permission Set Group assigned
- End users have the User Permission Set Group assigned
- At least one object is configured in the Configuration Wizard
- Team Member component is added to the record page
- Cleanup scheduled job is running (see Configuration)